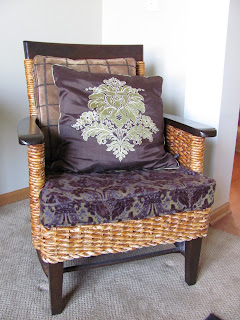
There's nothing more I love than a before and after. Last week I helped a friend recover a very old chair she found. It had fun lines, beautiful carvings and was solid. It's fabric was so bland and heavy in it's brown and orange, grungy pattern. The seat was sagging from deteriorated webbing underneath. I was so excited to rip off that old, disgusting stuff that I almost forgot to take "before" pictures (so sorry for the poor shots.)
Before:
After we ripped all the old fabric and webbing off (and a couple hundred nails pulled out,) we had to make a new seat. We chose not to mess with webbing and make something more solid.
The seat was a bit tricky since the four arms were solid down to the legs and the frame actually had a gentle arch to it. After cutting a template out of poster board, we cut it out of some 1/2" plywood with a sawsall. Then we cut it down the middle so we could get it in between all those arms. We cut a 2x4 to act as a center support to the chair (under our cut.) We then used drywall screws to attach it to the arched frame and the center support. We ended up with a very solid seat that slightly bows.
We cut our new foam using the same seat template. Using some spray adhesive, we glued the foam to the seat to keep it in position while we upholstered it. I also put a layer of quilt batting over the top to help soften the edges of the foam (lousy blogger that I am, I forgot to take photos of this step!)
My friend chose a cheery floral fabric that she said reminded her of her family's couch when she was growing up. We stapled and stapled, stretching the fabric over the foam and attaching it underneath the frame. On the back piece, we had to leave the staples exposed, so we covered them with some lovely gimp. We simply hot glued it over the staples.
And here she is after her little makeover:
I love the wood finish with the fabric. I could easily see it in a distressed ivory finish, as well. In these pictures she's only sitting in my foyer before she heads to her new home. I'll see if I can get a picture of her in her new home. Not only is this lovely chair all fresh and cute again, it is actually a very comfortable chair to sit in!
I wish I had been a blogger a lot longer because I would have documented a lot more of my before and after projects in the past. I found a few past projects that I actually had pictures of:
BEFORE AFTER
I replaced the caning on the back of the chair, stained them a maple color (the picture makes them look so orange. arghhh.) I also made a plywood seat (just more durable for a house with kids!) for these and added foam before recovering them. They're the perfect size accent chairs and now live in another friend's home.
BEFORE AFTER
Found these accent chairs for $10 each and recovered them in this nice nubby stripe. The playful fabric fits in beautifully in my friend's home of oranges and greens.
BEFORE AFTER
Found this great ottoman with 8-way tied springs and finally recovered it in some leftover vinyl leather.
Here's a couple of my AFTER upholstery jobs (I always forget those "before" shots:)
(l to r, clockwise: added and upholstered seat cushions to 2 pier one chairs; Third time covering this old chair from the Adirondacks-thought the leopard print would be a fun change; Found two $5 ottomans on casters and added legs and covered in a nice faux leather for easy cleaning; Two cute chairs for the front porch-just made some simple chair pads from an outdoor fabric.)
For this $1 yard sale chair I skipped fixing the broken rush seat and just plopped a planter in it to hold my seasonal flowers by the front of the house:
I just love taking something old and giving it new life and style. It's rewarding to re-use something and for little money turn it into something you adore. I've got two chairs and an ottoman that I'm getting ready to recover for our basement. I'll post those when they're done! Have fun!
This week I'm participating at:


