You know, what I love about the internet is how many cool products come your way that you might never have known about. Here are some that I would love to try out when I get a chance and see how they turn out (anyone locally here want to be a guinea pig?)
1. Laminate Countertop Resurfacing Kit
I first saw this product on a Today show feature and have been researching this. The overall results are that people LOVE this product. Found only a Lowe's, "Modern Masters" (
www.modernmasterstransformations.com/) provides a kit of everything needed to recoat 50 sq. feet of laminate. It costs $250 but compared to the cost of replacing your countertops in even laminate, you're saving a TON! Don't live with those 90's mauve or teal countertops another day! Here's a blogger who tried it and shows the process she took:
http://suburbanpostcard.blogspot.com/.
2. Spray Upholstery Dye
Made by
"Simply Spray", you can re-color your upholstery. It would be great for those chairs that are in great shape, but the color just doesn't work anymore. Depending on the fabric, you'll still see the texture and shape of the upholstery's design, but after it'll be all one color. There aren't many colors, but I'm thinking that black would be great for accent chairs. The website says that Hobby Lobby is going to be carrying it, so I forsee my heading there with a 40% off coupon and trying it! The few people I've read about trying it say it's a bit stiff at first, but with wiping it with a stiff brush and a few weeks, it really softens back up. Also, it is water/color safe after painting it.
(DIY decorating ideas)
(Little Green Notebook)
3. Stainless Steel Paint

There are cheaper paints out there that are "stainless steel" in color, but are in fact NOT made of stainless steel. Those types won't look real enough or wear as well. This product from
Thomas Stainless Steel is actually liquid stainless steel, meant to be brush applied to look like brushed stainless steel. It is supposed to be durable after you give it it's 3 light coats of steel and 2-3 coats of topcoat. It looks nice in most of the pictures I've seen. I do have one problem that I'm seeing. It sometimes looks fake to me when people paint the handles or the control panels on their appliances. If you look at the new appliances, those parts are rarely stainless steel as well. I think it'd look more realistic if you painted part of it in black appliance paint and not try to go for 100% stainless steel look. It looks like it'd cost about $60 to do all three appliances in your kitchen. I would think this would be great for those brass door knobs, light fixtures, a table or island top or that rangehood. (I also love black appliance paint for updating appliances. You don't HAVE to jump on the stainless steel bandwagon. It is a fad...this would be a much cheaper option.)


See, I dont' really like the handles painted. In fact, look at my home's stainless appliances:
If you stuck with the black appliance paint on the sides, handles and other areas, you'd be able to use less of the expensive stainless steel paint and also make it look more realistic.
4. Colored Chalkboard Paint
Hudson Paints makes gorgeous colors for chalkboards. No longer does it need to be just black. Look at some of these cute ideas:
A chalkboard wall mural for a nursery.
(pottery barn chalkboard center)
(Hudson paints-menu board)
Rustoleum's tintable version. A bit cheaper, but not as many colors.
If you want your writing to show up better/stronger, use the liquid chalk pens! (BTW, there is also magnetic paint and dry erase paint out there now!)
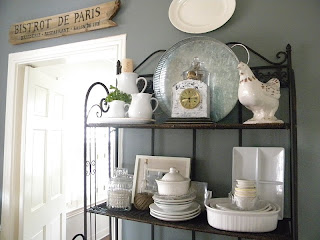
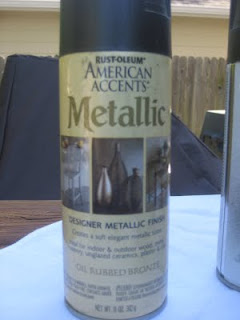
5. ORB- Oil Rubbed Bronze
This IS the finish of choice right now. I love this spray paint to give a great ORB finish:
These are the two best ORB finish paints I've tried. Re-do those awful bronze light fixtures, freshen up the vents, give your lamps an updated finish. Just about anything can be painted as long as you prime it right. The best finish is one where you either do a light coat, letting some of the original metal shine through slightly or after painting, use some rub'n'buff paint to add a little dimension and highlights. It just makes a subtle, more realistic difference.
(thiftydecorchick.blogspot.com)
(asoftplace.net) (mrshappyhousewife.blogspot.com)
(decormama)
You can freshen up your kitchen's hardware with this paint or order these fun half-moon pulls (and knobs) from this awesome wholesaler. You can get 25 pulls for $14!! I've ordered a few times from these guys and it IS real!!! Check out
Cripe Distributing for these:
I love how these look on painted cabinets! Heck, at those prices, buy them and spray paint them whatever color you need!
6.Muriatic Acid to Age Mirrors
Wouldn't you love to recreate the look or old, aged and distressed mirrors like these:


Well, it can be done. There's a great Tutorial here. You use a pool cleaning chemical to erode the mirror backing (after stripping off the painted back to the mirror.) I really want to try this one with a gorgeous mirror I have and use it in my future "shabby chic" basement decor.
Hope you found some fun, new products that you'd like to experiment with as well. I share any that I do in future blogs! Have fun!