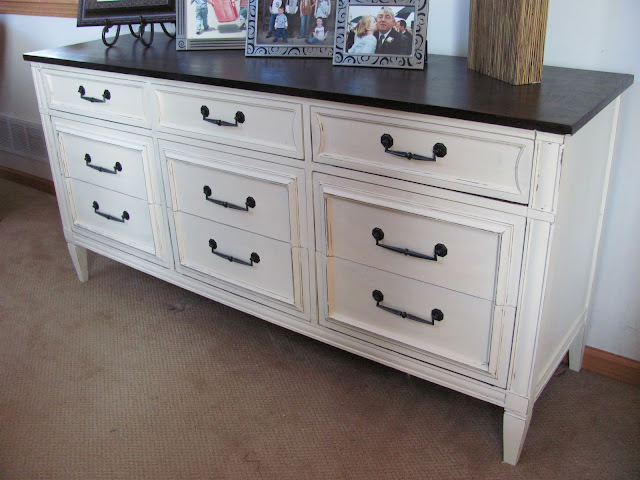
First up is a gorgeous buffet that was from Marshall Field's here in Chicago probably 60 years ago. While solid, it's finish was pretty beat up and that lovely orangey finish. The best part was the price- $20! Yippeee. I sanded off the top with a course of sanders (belt to orbital to mouse.) Then I purposefully beat up the top with the edge of the belt sander, a hammer, some nails and such. I wanted a worn, reclaimed wood look. I've discovered that it's pretty important to use pre-stain wood conditioner to get an even finish (see the difference a poor sanding job and no pre-stain affects the finish on the last item in this post!) I stained it with 2 coats of "Jacobean" Minwax stain. I also did two coats of polycrylic in satin finish.
For the base of the buffet, I used the "Old White" Chalk paint bought online from Shades of Amber. I applied two coats straight onto the cabinet (no sanding, no priming!) I then applied one light coat of clear wax and let it dry about half an hour. Then I used my mouse sander to rough up the edges and high points. Then I applied a second coat of wax and when dry, buffed it up to a nice sheen.
I absolutely loved the hardware it came with, so I just freshened it up with some "Oil Rubbed Bronze" spray paint.
The whole family forbids me from selling this one, so this is a keeper (we keep our favorite games in here, along with some of my fabric.)
The next piece was a fun oval table I found at a garage sale. It also had the orangey finish and made the whole piece seem very heavy. I did basically the same process (minus the roughing up the top part) as the buffet.
The table even came with a piece of glass already cut to the shape of the top! All that hard work will be protected. I did change out the handles of the drawer to something more current.
The whole piece seems lighter, the details of the curvy base are shown off better with a little edge-sanding and the handles dress it down a bit. It's a really fun piece, but alas, I'm selling it.
The last piece was a very nice, solid wood table I found that needed a bit of love. Unlike the other two pieces, this was that black, 70's finish. Yuck! I did the same treatment as the others (I do all three at once and assembly-line work on them. It really saves on the prep and clean-up of brushes.) On this table, though, I felt the top needed something to make it special and break up that expanse. I found a graphic of a compass rose online that I liked, blew it up to the right size and traced the design using carbon paper. I used my handy, dandy paint pen and a ruler and transferred the design to the table. I let it dry thoroughly and then sprayed it with spray polycrylic before I brushed on two coats of polycrylic. I love it! It's a fun addition that's subtle enough to keep it from feeling "too decorated." Hopefully a nautical-loving person or someone who just wants something unique will buy it soon.
See what one can of chalk paint can do? Impressive. The finish is just so fun.
While I had the stain out, I also restained this little shelf I had, that was just waiting around to be refinished. I thought it'd make a great little shoe shelf for an entryway. It even had a beautiful inlay across the front that I didn't want covered up by paint.
Not my best sanding job, but it's still cute. With the arrival of fall I'm madly finishing up all the projects in my garage so we can get our cars back in before the cold hits. I'm almost done with a gorgeous china cabinet in a lovely blue chalk paint. I'll be posting about that one soon!!
This week I'm Linking up to:


