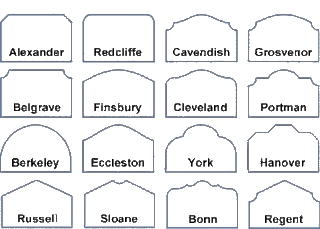
Step 1: I made a pattern for the headboard out of some old wallpaper. I figured out the size I wanted, folded it in half.
Step 2: I wanted a curve at each corner, so I found the perfect size lid and used it to trace my curve.Step 3: Lay your pattern on both your wood backing and your wood frame pieces. Cut all the pieces with a handy-dandy hand jigsaw (also known as a "sabre saw.")
The reason I did the wood framework around the edges, was to enable me to put my nailhead trim on later. If you weren't using nailhead trim, you could skip this step. I applied some woodglue to each piece of trim before screwing it to the frame. If you were to want a tufted look, this is when you would drill holes in the desired locations on the backing. Later, you'd be able to run a needle through these holes to add your buttons for the tufts.
Step 4: Cut to fit your foam to the center's shape. Glue down with spray adhesive. Hint: if you have an electric knife, it is so much easier to cut foam with. I don't have one, so it was a pain with scissors.
Step 5: Lay your fabric, right side down, on the floor. Lay your batting also on fabric. Place your wood piece also right side down on top of the fabric and batting.
Step 6: Starting on one side, in the center of the side, staple down a few inches. Then go to the opposite side in the center also, and gently stretch the fabric and batting. Staple down. Then work your way towards the corner, moving from one side to the other, remembering to stretch. Stop before actually doing the corners. Then follow the same method with the two remaining sides.
Step 7: For the curved corners, clip the fabric along the curve every few inches with scissors. Then, staple down, gently pulling tight as you do.
Step 8: Flip the headboard over. Now comes the fun part. Using a tape measure as you go, figure out how far from the edge you want your nailhead trim. I choose to buy the kind that comes in a strip, where you only have to nail in every few spaces. In other words, there will be a couple "fake" nail heads, then a gap for you to nail in a real nail. I found the best price on these on ebay. It was trickier than it looks to keep it straight as you went around the perimeter, so just be careful.
Step 9: Ask you toddler to jump up and down on it to check it's soundness. Just kidding! That was his way of "helping."
There are so many shapes and sizes you could do with an upholstered headboard.
If you're having a hard time picturing how it would look, just google "upholstered headboards" and loads of pictures will come up. Find the one that captures your attention and copy that style. To buy a headboard it can cost a pretty penny. Don't! It's really not that hard to make one. It takes very little wood, few tools and a minimal amount of fabric. Since it does take so little fabric, splurge a bit to get a luscious, richly textured fabric to give it that high-end look.
This week I'm linking to:


