Thursday, February 25, 2010

Inexpensive Wall Art Ideas

Okay, your college days are over (or perhaps not) and all you still have on those massive walls are a bunch of 8 x 10's.  It's just not cutting it, but money sure doesn't grow on trees around YOUR house. What to do?  Well, there are so many ideas out there of how to decorate on the cheap. Start by keeping your eyes open for large frames at garage sales, goodwill, or even the trash!  ANYTHING can be given a new life with just a bit of paint.  Look beyond the gaudy painting and see the gorgeous frame that just needs new paint.

This lovely, $5 frame was perfect as is for my daughter's princess poster.  Using my handy, dandy mat cutter, it came together so quickly.

How about framing some iron work?  I found these round pieces on clearance in the garden section of our Hobby Lobby for $2 each. I then found 3 square frames on clearance for $4 each, took out the old art, glued scrapbook paper to the carboard backing, and used wire to "tie" the iron to the backing (you know-Barbie-in-the-box style that takes you forever to open!)


For my Twins's room, I found a cheap airplane calendar and just picked our three favorite.  I didn't even bother with the mat cutter and just mounted them right on top of red and white scrapbook paper. Once again the frames were used ones found at a garage sale. (The airplanes hanging from the ceiling came from garage sales too!)


For our hall bath, I had a framed piece of silk, needlework from one of my husband's trip to China that I wanted to take up a bit more of the wall space.  I thought a wall saying would look good but didn't want to spend anything.  I went real cheap and just printed it out on cardstock, put on a good movie, and used an exacto knife and cut out each letter.  Using a piece of tape as a guideline, I literally just glued it to the wall with a school glue stick!  Three years later, it's still there, with no problems.


Here's a way to use up a bunch of those smaller and odd sized frames.  I collected a bunch, painted them all black and then played with the arrangement on the floor first.  You can even lay out some large sheets of paper and trace where each item goes, tape it to the wall and nail each in place.  When all hung, just rip down the paper. HINT: when hanging groupings, especially in high-traffic areas, I like to use a 3M adheshive square at the bottom of each item to keep them from going crooked on me. It'll save you OCD people like me from going nuts! 
 I used items from trips we've taken: postcards and stamps mounted on scrapbook paper, 3-dimensional items for interest, reproduction travel posters, and even a couple of bookmarks:


How about framing a collection of money, stamps, shells, buttons, or whatever!  My husband's coins and bills from his travels sat for years in our closet in a couple of Mason Jars.  For his birthday one year, I surprised him by framing them. I lined the cardboard backing with black velvet and hot glued the coins in place:


Are you like me when you look at scrapbook paper?  I find myself wanting to buy the gorgeous, artistic sheets of paper, yet have no project in mind?  They truley are works of art by themselves.  Why not frame them? I found this huge frame for a friends large, vaulted wall.  We started with this:


...and turned it into this by painting out the background art and using modge podge to apply scrapbook paper:


Look at our inspiration photo from Ballard Design:


How easy is this to custom-match your home's colors!

Similar in design, I saw this in a model home.  Each square was mounted on foam board first to help them pop in the frame:


Next, I discovered these fabulous papers from Italy called "Florentine Paper".  They're very retro, vintage looking and look gorgeous framed! You can find them at nicer art supply shops or online.  I like http://www.hollanders.com/papers/BrowseCategory.aspx?CategoryID=47abaf24-a620-4b0f-a4f7-dbba3fa8a05b.  I DARE you to look at these and not want to buy some!  I took three food papers, mounted them (with modge podge) on thin plywood (cut bigger than the print), then cut moulding to fit around the print and just used liquind nails to attach the moulding to the backing!  Easy Peasy!  If I remember right, when all said and done, we did them for about $10 each!  Grouped together they looked like this:


Aren't those fun? You could do the same thing with wrapping paper, wallpaper, or fabric.

So retire those 8x10's and go BIG!  Be on the lookout for my next post where I'll show you my favorite ideas from the Web for Inexpensive, creative, and uniqe wall ideas.


Tuesday, February 23, 2010

Photos to Easy Art

I absolutely love using photos in my decorating.  I adore my beautiful children and have their pictures displayed around the house.  However, sometimes you need something else on your walls to dress up a space.  I have my own mat cutter to help frame artwork, but sometimes I just need something really cheap and personal.  Enter my camera!  I still don't have a nice digital SLR, but you can still get some great shots with just a digital point-n-shoot.  I took some great pictures with this camera while in Italy with my husband. 


Now try uploading your photos to this Japanese website (http://labs.wanokoto.jp/olds) and watch them be generated into an old fashion-looking photo, scratches and coloring included! The page comes up in Japanese, but in the top, right corner is a tab to switch it to English.
How cool are those?! I just changed the ones in my bedroom from color to these old, sepia ones.
Now, to get really carried away, go to http://www.picnik.com/ and use their free effects tools to change up photos.  I took a picture of my NY hometown train station:


Look how you can soften it, add a vignette around the borders, and make colors pop!
Here's another enhanced photo I did:
How about that gorgeous sky color you can get?  Do a whole grouping of photos to look like this awesome lady's display:
(see http://www.tarawhitney.com/ for more of her gorgeous photos.)

See how she combines large, architectural pieces, with large, cropped children's photos? Use pops of color, vingettes. and unusual angles! Use clip frames like she did (from IKEA) or print out on canvas at Costco or even modge podge your enlarged prints onto boards.

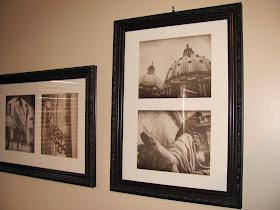
I did just plain Black and White in my 1/2 bath downstairs of our trip to Paris:


Have fun.  Be on the lookout for my next post: "More Inexpensive Art Ideas."

Friday, February 19, 2010

Vintage Family Rules Sign


Hello! I'm Erin from Decor AllureI'm a Mom of six with a love of decorating.  I love the challenge of trying to decorate for this crowd, yet budget-friendly.  I love garage sales, thrift stores, re-painting, re-upholstering, and re-everything!

     I have fallen in love with these vintage subway signs I'm seeing everywhere. But at prices like $785 for the ones from Restoration Hardware, it's out of the question.


 Then...I saw this family rules sign idea at http://www.tatertotsandjello.blogspot.com/ :


 Not really fitting my home's decor, but I liked the concept. Then this crazy lady's light bulb went off! I added the two ideas together to fit my style and created this:

    Here's what I did- I already had a frame that I had a piece of 1/4" plywood cut down to size for me at Home Depot (they do 2 cuts for free and many cuts for batted eyes!) I then painted the border with off white craft acrylic paint. After dry, I taped it off and painted my center black.  Two coats later, sand down the whole surface until sufficiently "aged." 
     I then typed up each phrase in a banner-making program and printed each out.  After cutting them out, I layed them out on the board as I wanted and taped the edges down to hold them in place.  Now here comes the fun part; place a sheet of carbon paper between the wood and printed paper.  On the first phrase, trace each letter.  Take off the paper and carbon and you should have a nice copy of your lettering.  Using a paint pen in off white (I used the medium and fine tip "DecoColor" brand from Michael's), trace again and fill in each letter. I kept a piece of cardboard handy to help blot the tip when it got a little too full. You can use the finer tip to define the edges of each letter a bit better. When done with the first phrase, move down to the next.  I just worked on the floor, laying on a pillow so I could really see what I was doing (and make sure I could really smell those lovely paint fumes!)
     When all dry, I sanded the letters to help age them as well.  Since making this first one, I found another larger frame at Goodwill.  It was taller and had a chunkier frame that I painted black:


I even made a few on some ready-made pine boards from Home Depot and hung them without a frame. Here's one that's dark brown and cream:

    This really wasn't that hard, yet it makes such a fun, custom sign.  Not bad for just under $20, huh?  A friend suggested making a subway-style sign using street names from your life (your different homes' streets, the street you grew up on, etc.)  I just saw this idea of writing a poem or saying on a large piece of plywood to make an inexpensive, but large piece of artwork for that big, empty wall:

   You can find instructions for this from Amanda at http://www.apartmenttherapy.com/sf/diy/an-easy-doityourself-statement-sign-heres-lookin-at-me-kid-107848
    Oooh, the possibilities!  Try it! Just send me your signs for future inspiration.