Friday, February 24, 2012

From Shabby to Chic!

I've been busy getting a few more furniture makeovers done and getting my storeroom cleared out (well at least for a few months until garage sale season starts!)  First up are a pair of chairs I re-upholstered and repainted.  I just have to put the "after" pictures first because the "befores" are truly that hideous. Here's how they look now:


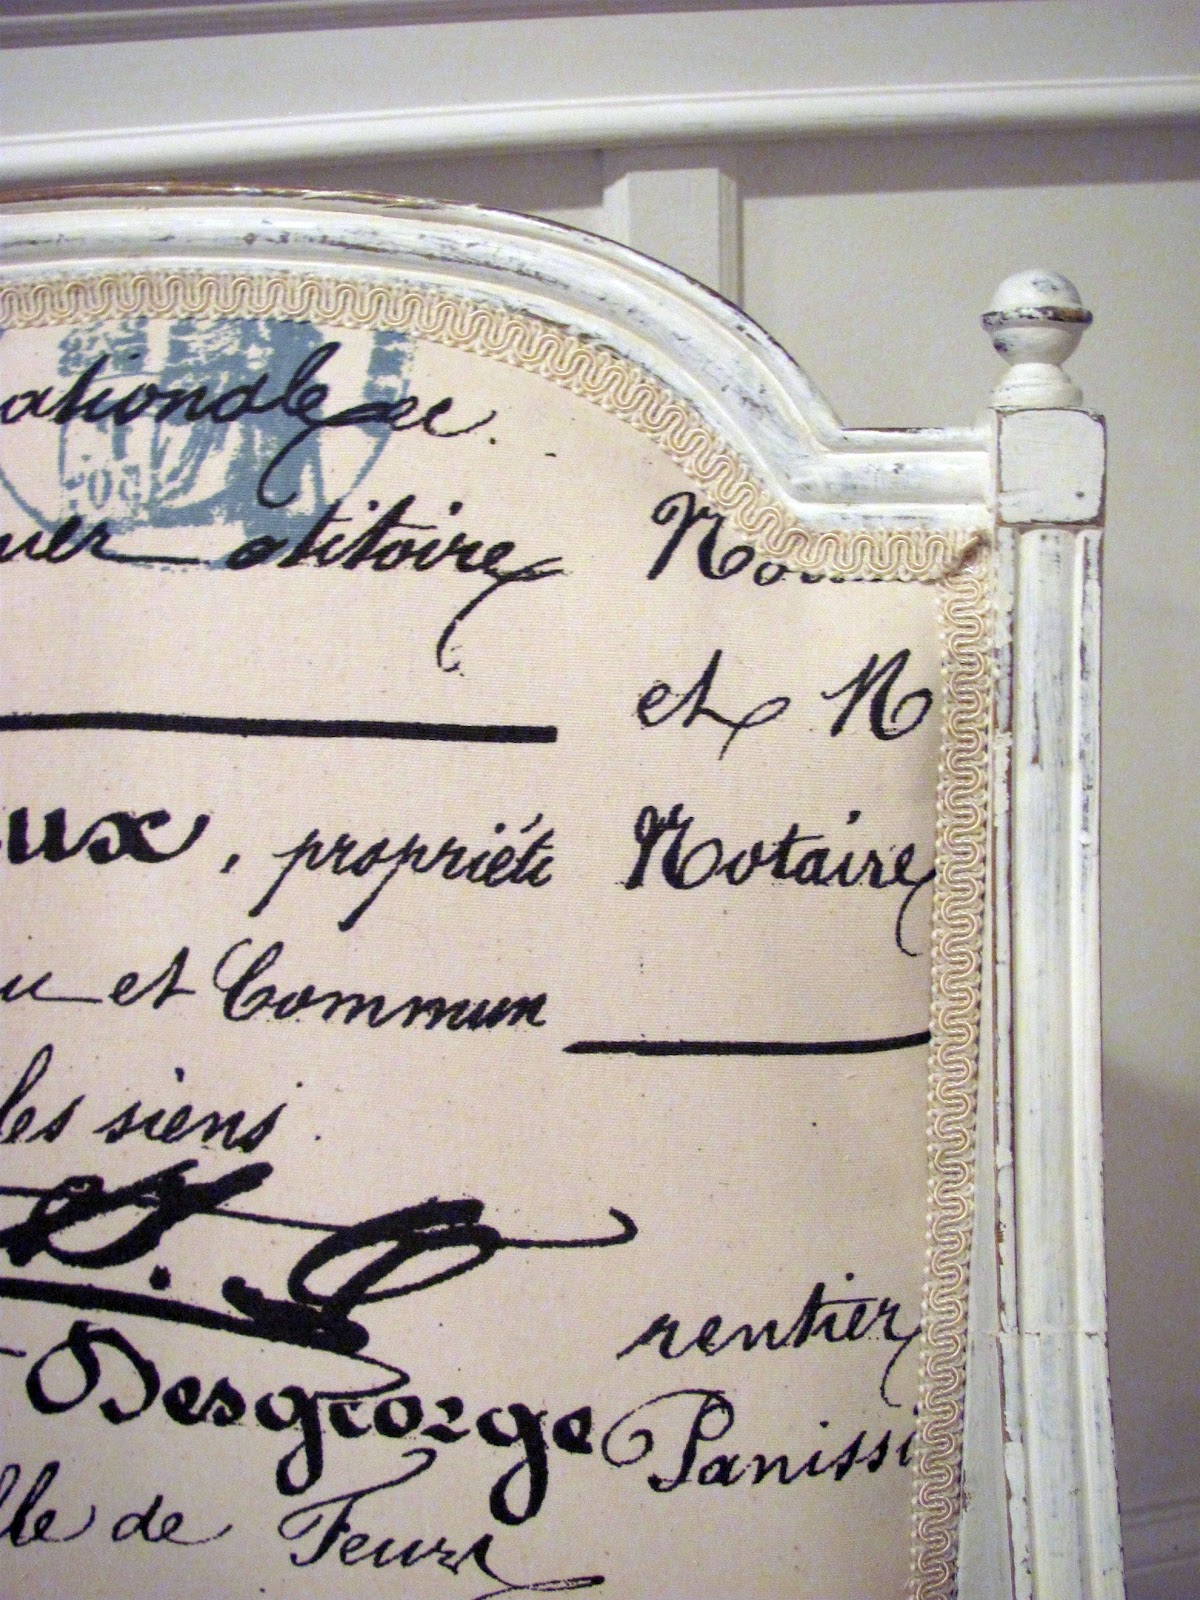
Isn't that fabric lovely?  I've seen so many of the script fabrics around, but man, are they pricey.  When I found this fabric for only $7.50/yd, I grabbed 6 yards of it quick!  It's actually a great mid-weight and I used scotch guard to further keep it nice.  The french script is a very dark brown and there are "postmarks" in a lovely blue color.  I trimmed it in a linen color gimp.


Once again, I used ASCP in Pure White to hide the hideous gold frame.  I distressed and waxed it to a beautiful patina.

 Here are two shots of the filty, ugly before:


Yup, that was bad. Horrible fabric and colors, but great shape and sturdy.
 This is much better:


Ahhh. It's going to be hard to part with these beauties.

Now if you're a fan of the 80's orange oak, now would be a good time to avert your eyes.  The next two tables were solid and had great shapes, but the finish was just too dated. Somewhere on my lovely, unorganized hard drive are the before shots of these tables.  But do you think I can find them? Noooo! Argh. Here they are after and looking much fresher:


Isn't that pedestal lovely?  It felt so heavy and thick before.  With the paint, it feels so much lighter, yet shows off it's classic shape.

Once again, I used the amazing Graphics Fairy for a vintage French label.

And lastly, another tired oak table was lightened into this beauty:

I did a little heavier sanding and distressing on this one for more character.


Can I just tell you how much fun furniture re-finishing is since discovering Annie Sloan Chalk Paint?  If you haven't tried it yet, you MUST!

I have a beautiful duck-egg blue table partially done and a cute china cabinet finished, just waiting for me to take pictures of it.  Stay tuned for pictures...


This week's Link-Ups:


Tuesday, February 14, 2012

Winter Mantel

I've actually had this put together for a while and yet it's taken me this long to post about it. After the Christmas decor came down, I needed something to put on my foyer mantel.  While Valentine's day seemed the obvious decor route to go, I knew I HAD to have something to last longer than until Feb. 14th.  It's just become that type of year for me.  I'm so busy and don't have as much time for rearranging and redecorating.

After decorating for the wedding reception, I figured I was crazy not to re-use a few elements.  I grabbed 4 of the glass vases and partially filled them with Epsom Salt (the dollar store was the cheapest way to buy it.)


Since we've had a very snow-less winter so far, I thought it'd be fun to "make" some of our own!  I took some of the Dogwood Branches leftover from the wedding and added some "frost" to them.  I sprayed each branch with spray adhesive and then sprinkled more Epsom salt and coarse glitter on them.  The light catches it just right and they sparkle!


I found a free printable online that said "Let it Snow" and figured that would be a better option than running outside to do a snow dance. So far even that hasn't worked!  I put the print in an old frame I already had. I also had an old, gold frame that I quickly spray painted silver. I added a few candles and silver votive holders and that was it! Simple display of silver, white and glass.


And as part of the whole New-Year-clean-and-reorganize thing, I decided our entry shoe situation HAD to change.  I looked everywhere for a solution that the family would actually use. I swore I'd never buy any furniture from IKEA, but I finally cried "Uncle!"  These cabinets were just the best solution out there.  They're narrow, yet hold enough shoes out of sight.  So far it's working perfectly for us!! I had just barely sold some of my furniture re-dos and it was just enough to get these guys. Yeah!


Ahhh. Much better. Happy foyer, happy me!!

Wednesday, February 8, 2012

Internet Inspirations

When I have some down-time, I like to browse my favorite decor blogs.  I save fun ideas and beautiful images.  When I get a bunch, I like to share them here. Well, it's that time again!  Look what I've seen:

 
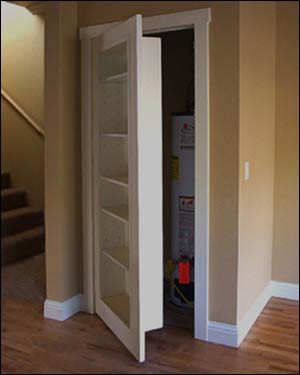
How cool is this idea?  A closet door is turned into a bookcase! This would be a perfect idea for small spaces.  I just wouldn't fill it with Grandma's china with the way people slam doors around here!

Here was a fabulous tutorial from A Charming Nest on adding more character by way of moulding to your doorways.  For those of you that have more contemporary homes that have little moulding, this would be an easy way to add some.

I'm not sure which I love more: the blue and coral combination or those awesome striped drapes!

Courteny Hill Interiors
I love how this memo board was jazzed up a couple of notches by adding nailhead in a great graphic pattern.  And how about that lucite chair?  I have got to get one of those!!


Kara Paslay Designs
How cute is this cabinet.  This couple collected odd drawers and built the cabinet to fit around them.  The mirrored panel flips up to hide the DVD player. So creative!

Polish the Stars
How cute is this? For this boy's superhero room, the closet door was painted to look like a phone booth!  Love the bright red element that is added to this room!

I LOVE this idea for a great, large piece of art.  This blog shows you how to make a piece of art using your wedding song and aging and enlarging it. An inexpensive piece of art that has meaning.


I love those blueprint artwork seen in Pottery Barn and Restoration Hardware.  But the price!!! This blog shows you how to use copyright-free prints and make them yourself!


I LOVE this idea! How about mounting an old china cabinet about the sink?  It's a fun way to give a custom look to your kitchen without a huge makeover.  You sure could do this idea on any awkward wall (you know, those kitchens where one lonely cabinet sits off all by itself to one side? Take in down and put something with character up!!) This would also be a great idea for a renter.

Do you have one of those ugly intake vents on a wall that bugs you? This lady "covered" it with an easy-to-find iron piece that still lets the air flow, yet dresses it up.

A great DIY headboard by The Idea Room.  It's simple but gives such a custom and elegant look.

I think this is such a cute idea. Make photobooth-style art for a hallway or family room. Have fun taking photos on a white background, using some photo editing, then print them out in squares (I love costco!) and hang as if in photobooth strips (I'd probably just spray mount them on foam or MDF.)

Odeedoh
How cool is this Triple bunkbed idea? It would not only be a fun space for the kids, it would save a lot of room for those that have to share a room.


Here's a great tutorial of how to build a wood frame for your flat screen out of scrap lumber.  I love this idea!


Monday, January 23, 2012

Wedding Open House Decorating

I just completed by first experience decorating  for a wedding open house.  It was held in a church gym. It was a large, empty space that needed to be warmed up, but on a budget.  I had a lot of fun finding ways to decorate and keep it inexpensive.  I still don't have a nice camera and with the lights turned down low, these don't quite capture the charming, intimate feel we achieved.  Hopefully, you can still get a sense of what it was like.


To bring down the ceiling, we strung white lights back and forth across the gym and then hung 100 tisssue paper poofs from fish wire and paper clips. Some amazing friends helped fold and cut the tissue paper and then the day before the set-up, helped again to poof them all out (they take up a LOT of space so we couldn't do it too far ahead.) A couple days after Christmas I was able to pick up HUGE packs of white tissue paper at Costco for next to nothing. For instructions on how to make the two styles of poofs, I used THIS link.


The bride chose purple as her accent color so we made table runners from a fun purple damask pattern from fabric.com.  We used clear vases (mostly from TJ Maxx because they were all under $7!) and used battery-powered candles (purchased at Costco around Christmas for a crazy-good price) and dogwood branches from my yard.  I needed to prune my bushes anyway and just had to wait until the cold winter turned them that lovely red.  We ordered these beautiful birds from Floral Trims.com.


I found a huge lot of glass votives at goodwill and we used battery powered candles in them.

Since we had a stage to work around, we chose to use it.  I placed a garden bench and a few silk plants and had all the wedding gifts placed on and around the bench.  Across the front of the stage, we wrapped LED lights in purple tulle for a  nice "fairy" effect.  I made Four large paper flowers to dress it up further.  They really weren't that hard to make and I once again took advantage of the after-Christmas sales and found the purple wrapping paper on clearance.  I followed THIS tutorial to make the over-sized flowers.


Since the gym had these large, gold dividers, I just embraced the finish and repeated the gold in 4 large frames.  I found the frames for really cheap at Goodwill and on craigslist.  I will later re-use them for my sign-making business. Two were already gold and the other two I spray painted.  I used wood underlayment to paint on the lettering (because it's cheap and lightweight.)  I painted the backgrounds purple and then hand-painted on two cute sayings.  We hung them with fish wire also. 


These frames look so small against such a large space, but they're actually well over 4 ft. long.  I had to pick them up with my van!  The other two gold frames I left empty.  One went behind the food table.  I used a fake boxwood wreath I already had, clearance purple ribbon from christmas and two purple monograms hung with fish wire.


And the other Gold frame went on the opposite end of the gym.  I left it emptier so that it would "frame" the couple.  I used a rug from home to "set the stage" and a tree to soften it.


(The carpet looks dirty, but it's just the shadows. Darn it!)

The other big problem I had to fix were the ugly gym mats under each basketball standard.  They were bolted to the wall and HAD to be covered up.  I finally came up with doing an Anthropologie-style ruffled curtain.  I found Queen size flat sheets at my local Habitat Restore for only $3 each!  I used 3 sheets to make each ruffled cover.  A couple more good friends came over to my home to help me ruffle and pin them.  I'm guessing that we'll be able to use them again for future events.

Three other little areas received some love.  We had a guest book table, backed with a screen where people came into the gym (the table cloth was purple NOT blue as it looks in this shot!),

A little sign just inside the doors to the building to direct guests,

And the punch bowl table.


Overall, it came together like I was hoping.  You definetely could ratchet this up a few notches if it were to be a full reception.  In this case, it was meant to just be a smaller gathering for the groom's family and friends in Illinois (the weekend after the wedding and reception in Texas.) It was a really fun project to do for some dear friends. 


This week I'm linking to:

Related Posts with Thumbnails